Photo Tips
Preventing Photo Damage
WHY SHOULD I ARCHIVE MY PHOTOS/DOCUMENTS?
Photos get damaged…
With our professional scanning and archiving equipment, your photos, slides, and negatives will be scanned and archived to CD or DVD. Your disk will contain high resolution digital copies that can later be used for e-mailing, enlarging and printing of your digital photos. The quality of your digital photos will not degrade as would physical photos.
Peace of Mind…
At your request, we will keep your photos on file, should anything ever happen to your originals or the CD/DVD we made for you. We offer this service at no extra charge, because we value You, and the memories that your pictures hold.
Convenience…
You will be able to view your pictures on your computer, TV or DVD player and you will be able to print as many high quality reproductions as you wish.
More than 2,500 photos can be stored on a DVD and can be organized into categories.
- First 100 ———–$1.00 each
- 101-200————$.90 each
- 201-300————$.80 each
- 301-500————$.70 each
- 501+—————$.55 each

Archive your photos/documents. They will last for generations to come!
Before A Disaster Occurs
When storing your prints, be sure to keep them out of direct sunlight and humid rooms, such as basements or bathrooms, and away from intense heat. Cool, dry, and dark are the ideal conditions for long-term photo storage.
Prints stored in an album last longer than those in frames, but avoid albums with self-stick, “magnetic” pages and PVC plastic overlays. These albums cause rapid fading and discoloration. Instead, look for albums that are acid- and lignin-free. These chemicals can yellow and damage pictures.
If you want to display your photos, put them in frames under glass, preferably with an anti-UV coating. Aluminum frames are ideal, as they are lightweight and are not affected by humidity. Also be sure to put an acid-free mat between the frame and the photo to prevent your prints from sticking to the glass over time.
We all have piles of photographs lying around in drawers, boxes, where ever. You’re not alone! Wouldn’t it be awful to find the hot water heater had leaked, or rain water settled in your storage boxes or mold from the basement attacked your family’s history? That would be a disaster. Prevention is the first answer.
The best way to make sure the photos don’t stick to each other is to find a way to store the them so they don’t lie around in a pile touching each other. Try one of the following two suggestions:
- Buy three hole punch archival plastic pages for storage of the photos and negatives and then, once filled, put your pages in any school notebook with a plastic cover (colored cloth covers could bleed colors on your photos if gotten wet).
- Use an archival “shoe box” type approach with archival separating papers (interleaving sheets). I guess it depends on your personality which one you choose… they both work.
The correct plastic used for the pages should be polyester, polypropylene or polyethylene. Besides being good for photos, these materials won’t transfer the wording off of your photocopies onto the plastic. Bad materials to be avoided are vinyl, polyvinylchloride (PVC) or anything that smells weird or strong.
The offgassing vapors will ruin the colors of new photos and accelerate the aging of old ones.
As an alternative to using the plastic page protectors, we have also found and used already-made photo albums from large warehouse type store. The album’s are advertised as having pages made of acid free materials and photo-safe plastics (no PVC). Providing you can believe what they tell you, these albums are probably OK to use. If you would like to be really sure, check the album for the company’s #800 phone number and ask them to confirm that everything is on the up and up. I have bought them every once in awhile at the large warehouses like Price/Costco. Inquire around. You may be able to get them at stores like Walmart.
Don’t use the magnetic page photo albums either. The plastic on the front is always bad and the stick em’ on the back will eventually hold the photo so tight that you won’t be able to get them out safely. We’ve seen people rip their photos trying to get them out of old magnetic albums. The pages also yellow badly and look bad. The appeal of the “magic page” is short lived.
If you have large historical photos or some of odd sizes (like the 10″ x 48″ panorama photos) you will need to buy a special “holder” just for that item. Consider some of the archival boxes or specialty envelopes and enclosures, or look through the plastic container section of your supermarket. These containers are made of polyethylene or polypropylene (acceptable archival materials).
By taking these simple steps to separate and safeguard your photos (which could be done while watching TV), you will have made sure that they will not stick together if the weather gets hot and humid or if the photos get wet. Cardboard boxes and the like not only soak up water but the cardboard itself will bleed off impurities when wet and the yellowing will be carried by the water to stain everything thing else around.
You will have also protected them from getting fingerprints, bent edges and they won’t get scratched up (like the ones in your drawers). These efforts will help you to feel much better about their preservation.
After an earthquake:
- gather the photos
- store them safely
- try not to further damage them
If your photos didn’t get crushed, ripped, scratched or dirty because of the disaster, they might during the clean up! Get them stored and out of the way as soon as possible. Then, follow the steps outlined above.
- DO NOT WIPE DIRT OFF OF THE SURFACE OF PHOTOS (they will sctratch) Try blowing the dirt off.
- DO NOT TAPE RIPS TOGETHER (the tape will ruin the photos).
- DO NOT USE GLUE (will stain). The rips won’t get worse… save the repairs till later.
Disasters with water:
- DON’T STACK WET PHOTOS INTO PILES!
- DON’T TOUCH THE SURFACE OF THE WET PHOTO!
- DON’T LET ANYTHING TOUCH THE WET PHOTO SURFACE!
- DON’T PULL STUCK PHOTOS (if they have dried) APART!
The following is a list of types of photography and what should be done if they get wet. After this list is a general explanation on how to go about their salvage and preservation.
Modern photography: This is your priority list, as far as which type of photography needs to be saved first, if you have to choose what to save from a disaster: Color prints, the Black and white prints, then Slides (transparencies) and then Negatives.
This list is based on the fact that color prints will be damaged by water the fastest and so on… then, of course, your priority may be to save the photos of the kids first…
After the emergency situation has passed and you have made sure that everyone is safe and as soon as you have gathered your wits about you, your immediate decision is needed for the salvation of your family’s photos:
Dry them out or Freeze them (so you can work on them later) within 72 hours or
Keep them in clean cold water (change the water daily) until you can do something.
Motion pictures should be rewashed by an experienced film processing lab within 72 hours. Till you can get the wet film to them, fill the film cases with clean cold water or put into a basin of water (change the water daily) so they won’t dry out and stick to each other. Once the film has been washed, stabilized and dried, it is important to store it properly, even temporarily, such as in a sandwich bag or archival box.
Microfilm rolls: It is imperative that the impurities are washed out and that the film does not stick to itself. Because of the sheer volume of material to be handled, it is recommended that after putting the film into a basin filled with cold temperature (distilled) water that the services of a photo lab be sought out within 72 hours.
Do not remove the film rolls from their boxes: try holding the cartons together with string or a loose rubber band. Once the film has been washed, stabilized and dried it is important to store it properly, even temporarily, such as in a sandwich bag or other archival material.
Old black and white prints on paper: Keep in clean cold water (so they don’t start to dry out and stick together) until you can do something. If they are going to sit in a basin of water for a couple of days, be sure to change the water daily. The photos must be dried separately within 72 hours.
If you have other types of old photos but don’t know what kind they are, call us immediately. Do not pass “GO.” Do not collect $200.00 If you know what you have, the following list should help put the fear of God in you. They are all super sensitive and the success rate for recover is low (in this case an ounce of prevention is worth more than a pound of treatment).
Tintypes, ambrotypes, pannotypes and collodion negatives are a first priority item! They need to be dried immediately, face up. Do not put these types of photos in the freezer and do not put them in a basin of water as this will destroy the emulsion. Be prepared that the success rate for recovery is low, but this may depend on your care.
If there is something left, even if it’s Only part of a face, We Can Digitally Restore it, but the less Restoration the better, for both parties. Also, be very careful when handling the delicate glass supports.
Daguerrotypes need to be dried immediately, face up. Don’t put them in water and don’t freeze them.
Nitrates with soluble emulsions need to be put in the freezer immediately. Try freeze drying. Very touchy, be careful when handling.
Old paper backed photographs (vs. plastic coated new photo prints) may be yellow and brittle. Because of these deterioration problems, handling your old vintage photos on paper while wet compounds your problems and could result in you causing more damage when handling them than occurred as a result of the disaster which you recently experienced.
No matter what kind of photographs you have, if they get wet, they are your No. 1 priority. Red alert! You must act now, while they are wet, if you want to increase your chances of salvaging your photos. This should be done within 72 hours. Don’t let them dry out (if they are in a pile).
If you have a large quantity of wet modern photographs or if you have motion picture film on rolls, then you may not have any choice but to call us for immediate help.
Remember, once dried, the photographs, especially color photographs, which are securely stuck together may have a very low percentage chance of separation without damage. Keep them wet till they can be worked on.
The worst situation in which you may find your photography is if they are stuck together in a pile. Photographs and negatives have a surface coating (an emulsion) which, upon getting wet and then drying, may have adhered itself to the print next to it. DO NOT TRY TO PULL THEM APART! You need to be very careful when handling wet and damaged photos as they will be especially fragile.
If your photos are ripped, stained, dirty, bent or wavy there’s no hurry. They won’t get worse if you take care of them. Your only priority in an emergency situation is to keep things from getting worse and to preserve that which could be further damaged.
If you find a pile of color or black and white photographs or negatives stuck together, the first thing that should be done is to put them into a large basin of clean cool water.
DO NOT TRY TO PULL THEM APART! It is possible that the photos emulsion will swell in the water and release the photo attached to it. You may have to leave it in the water for 24 hours. Make sure the water stays clean.
If your photographs are stuck together because they have gotten wet, and if they are still wet or damp, it is best to get them into clean cool water as soon as possible. Do not let the wet/ stuck together photographs dry out, if at all possible.
If you have a large amount of wet photography that you cannot deal with immediately (within 72 hours):
- Remove them from the basin of water.
- Rinse off dirt, mud, scum under gentle running water.
- Do not try and separate any photos stuck together.
- Separate with wax paper all individual photos or groups of photos.
- Put them into zip lock freezer bags.
- Put them in the freezer (yes even your one at home will do if you have room, but don’t stack the steaks on top!) and freeze them within 72 hours. Call a local meat processor, ice cream company or other commercial freezer for help with a lot of items.
By either freezing or getting your photographs into a basin of cool or room temperature water immediately, you will avoid the prolonged humid conditions that are conducive to mold and mildew.
Unfreezing Your Photographs
If you have frozen your photographs, the best way to save them is:
- Ask around town for freeze drying services. This is often the best technique for drying which results in less damage. There are problems with freeze drying photos, however, so be careful.
- If you have to do it yourself be extremely careful, Call us if you have questions!
- Only defrost as much stuff as you can easily handle (space for washing, drying etc.).
- Put the frozen photos into a basin of cool water and let them defrost at room temperature (kind of like your frozen turkey).
- Let the photos separate themselves over a couple days (change the water so it stays clean).
- Any photos you try to detach will probably have part of the photograph pulled off.
- Once separated, rinse and let them air dry.
Mold is one of the more severe problems you will have to deal with after your photos have gotten wet and stayed damp. That is why it is so important to take action as soon as possible after the unfortunate disaster. Once your photos get it, it will be hard to get rid of. Let us summarize what we have already written with a list of what you can do to minimize mold problems:
- Set up fans to circulate the air, no heat.
- Dry the items within 72 hours, no direct sun or heaters in a closed area or…
- Freeze all items that cannot be dried.
- If you have to let something sit in a tub of water, change the water every 24 hours.
If your photographs have already been afflicted by mold or mildew:
Get them dry as soon as possible (moldy items are high priority!). This stuff grows fast!
Protect yourself with a face mask with a carbon filter (mold spores are very small and may penetrate regular dust masks). Some people are allergic to mold.
Outside, away from other papers, photos etc, remove the surface mold with a very soft, clean brush. Don’t let the mold dust get on anything else or later, when the humidity rises, the mold spores that have settled will grow again.
If there is a residue on the surface of the photo, take a cotton swab and wipe the surface with isopropyl alcohol. This should remove the mold and may even kill some of it.
The more severe the problem the more you will need our professional help. The older the photo, the more urgent you will need our services.
Photographs covered in mud also need to be cleaned off (see next paragraph) and dried within 72 hours, otherwise interleaf the photos with wax paper and freeze them. Drying can be done by circulating cool air (with a fan) through the room. If you turn on a heater (in an attempt to dry things out more quickly) you will only cause the humidity to rise and mold will grow more vigorously. Expect some mold growth anyway.
If you have a fresh (it just happened and is still wet) mud problem, rinse off the photos using a gentle flow of cool water or by gently swishing it around in a basin (kind of like panning for gold). DO NOT RUB ON THE PHOTO. If you can, get the mud off while it is wet. There is more likelihood of staining if the mud dries.
For dried mud, put the photo(s) in a basin of clean water. After letting it sit for an hour, gently rinse clean. DO NOT RUB ON THE PHOTO.
CAUTION: Old, hand tinted, colored photos are often colored with paints that dissolve in water. If you rinse them, you will wash off the color.
If it is not possible for you to send your photography to us, see the next paragraph for drying instructions. After drying, protect them with proper storage & choose the photos you would like to get Restored.
Do not under any circumstances use:
Bleaches
Detergents
Fungicides
Disinfectants
Staples or paper clips
If you are going to attempt to separate your modern photography by yourself, it is best to let the photographs separate themselves over a twenty-four hour period in the basin of water. You can let them sit longer (in fact you may have to) but be sure you change the water every 24 hours.
When handling the wet photographs, do not rub, mush, or caress the surface as this will damage the emulsion and the image. If possible, use a pair of blunt tweezers and hold the photograph by the edges. Once the photographs have separated, it would be best to rinse or dip the photographs in a basin of clean, room temperature distilled water. Do not let photos sit in dirty water.
Photographs on plastic coated paper can be hung, on a string which is stretched across the room, with clothespins but don’t do this with old photos on paper. The old brittle deteriorated paper will fall apart. If you do not have a lot of photographs, they can also be dried face-up on a towel in the open air but be careful where you set them out. Gusts of wind or a wandering dog could really make a mess.
Cloth towels will wick away any water and should be lint-free, if possible.
You could also use unprinted newsprint paper or butcher paper, with less success.
Avoid placing wet photos on your old newspaper, colored paper or other easy to find papers. Inks can smear, dyes and colors can run, and acid deterioration products could be absorbed by your paper backed photography when wet.
You may accelerate the drying with a blow dryer:
- Don’t blow the item off the counter-low blowing pressure
- Hold the hair dryer about 20″ away
- You can set the heat setting on hot, but…
- Do not get the photograph hot.
At this point, your photograph is detached and impurities may have been washed away. You have saved your photograph but after drying you may have ended up with a warped photo. The photographs, once dried, can then be placed in individual protective sleeves. Besides using the photo sleeves or other enclosures and archival envelopes to protect the photos mentioned in the preceding section, you could also use sandwich bags from your supermarket (they are pretty flimsy though) and then put them in a protective box. Make sure your photographs are completely dry before placing them in any holders.
Fill out our Order form and package your dried photos in a sturdy box. Insure the contents and send them to us with detailed instructions on which ones you would like us to Restore and which ones we should just Scan in and Archive. Keep in mind, the photos will only get worse if you don’t Restore them or Archive them!
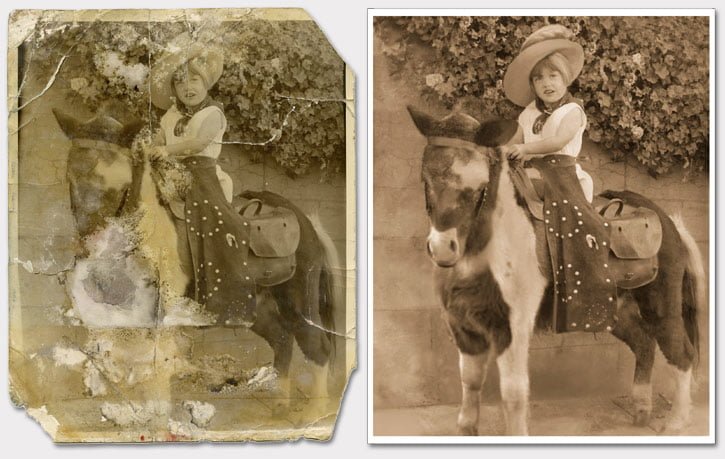
If you have photographs that have been ripped, scratched or otherwise damaged, don’t despair. We are here to help. There are BIG Discounts for large amounts of photos. Make sure to check with your Insurance company, they might just flip the bill for you.
Photo Albums:
If your photographs are in a photographic album and the album has been destroyed by water, try to remove the photographs from the album and discard the album. This may be easier said than done… there are a lot of things that can make the salvage process difficult: inks that run, glue that won’t release, paper colors that run. You will need a lot of patience… If pages are stuck to the photographs, place the pages of the photo album and the photographs together into the basin of water. As soon as you can remove the photos, pull the pages out of the wash water and then change the water. Do not let photos sit in dirty water.
If there is writing in the photo album that needs to be recorded, preserved, or remembered, take every handling precaution possible to not have the paper pages fall apart
when wet:
- Use wet strength paper towels to support pages from below while moving them.
- While trying to remove photos, use little spatulas or a small knife to gently detach hard to get apart areas… you’ll need some finesse… patience…. don’t just rip it apart.
- If you want to run water over the pages to remove gunk deposits, don’t let the tap run water directly on the page… it will tear it into little pieces.
Do not try to “dry the page off” with a towel. Let it air dry (or help it with a hair dryer if you want) face up on cookie racks or on paper toweling (which should be changed as it gets soaked). - Once the photographs are removed, the pages can be air dried and then photocopied to preserve the information for transcribing at a later date into a new photo album.
Conclusion
You need to remember something: once you have salvaged from water, cleaned off, and dried your family history photographs, they will not be in perfect, restored condition. You will have done your best but the casualties will be high. That’s the nature of the beast, photography. Earthquake and tornado (non wet) damage will be much easier to deal with.
The important thing is to remember your priorities:
- What is most important to you?
- Can you get a copy of something lost or damaged from someone else?
- Which Photos will have to Restore to prevent further damage?
Our suggestion is to try and salvage everything from the disaster but when it comes time to clean up and recuperate, save your most important things first, if you can. ©2005 Scott M. Haskins.
There are many types of photo albums available. These albums may or may not be appropriate for certain photos in certain circumstances. What may be safe and appropriate (and inexpensive) for everyday disposable snapshots that will only be of interest to you for a few years may not be appropriate for photos that are family keepsakes or those destined to become your family heirlooms. Keep in mind the long term implications when selecting an album as some may cause damage in the short or long term and should not be used with family keepsakes or those you wish to keep for decades.
Album pages, not the covers, have the most influence on the long term preservation of your photos since they are in direct contact with the photos and can cause the most harm.There are three types of album pages:
plastic pocket pages (pages with pockets for inserting the photos)
paper pages with or without a clear plastic cover sheet
so-called magnetic albums or self stick albums having clear cover sheets
Plastic pocket pages have the advantage that no adhesive is needed to secure the photo but photos may slip out of the pocket opening. Paper pages require some method of securing the photo to the paper such as photo corners or adhesives. Self stick pages provide their own means of securing photos to the page, but surround the photo with adhesive which may be deleterious to the photo.
All papers, plastics, and adhesives used in albums should pass the Photographic Activity Test (PAT). The PAT was developed by the American National Standards Institute (ANSI) and is a test that determines whether or not a storage material will cause fading or staining in photographs. The PAT standard code is ANSI IT9.16 Photographic Activity Test. Many manufacturers test their products with the PAT and advertise storage materials and albums which pass the PAT. In addition, ANSI has another standard for photo storage materials: ANSI IT9.2 Photographic Processed Films, Plates, and Papers–Filing Enclosures and Storage Containers; this standard specifies the high quality of the paper and plastics, and recommends designs for storage materials such as envelopes and pocket pages.
In general, plastic pages and cover sheets made from uncoated pure polyethylene, polypropylene and polyester (also called Mylar D or Mellinex 516) are considered stable and non-damaging to photographs. Polyester is crystal clear and is more rigid than polyethylene and polypropylene. None of these recommended plastics have any odor to them, while polyvinyl chloride (PVC) plastic does have a strong odor (like a new car odor). Avoid the use of PVC plastics–they generate acids which can fade the photograph in time. In addition, the plastic can stick to items inside and, in some types of photographs (and printed items such as baseball cards), actually cause the image to transfer to the plastic. For these reasons, PVC cover sheets, pages and albums should not be used for valuable photographs or those you want to preserve for a long time.
Look for paper pages that are made from a high-quality, non-acidic, lignin-free paper (either buffered or unbuffered) made from cotton or highly purified wood pulps. Paper pages with plastic cover sheets offer more protection to the photographs–from fingerprints, accidental spills, and by preventing the photos from sticking to each other in damp conditions.
Self stick albums should be avoided for any valuable photos that are meant to be kept for a long time. Self-stick pages are coated with an adhesive that stains photos and possibly fades some types of photographs over time. In addition, in the long term, the adhesive either dries up and fails after several years and discolors to an unsightly dark yellow, or, in the short term, the adhesive becomes very tacky making it difficult to remove photos without damaging them.
Albums are available in many styles from spiral or ring binders to post or clamp bindings or those bound with traditional sewing; with cloth, plastic or leather covers. All are acceptable and your choice of album style may depend more on the “look” you want and cost. One thing to remember is that the album should not be overstuffed once you have added all the pages and attached the photographs. Overstuffing is particularly bad for post and sewn bindings–the added thickness of the pages with attached photographs might break the narrower binding and splay open the album. Overstuffing also makes it difficult to turn pages in a spiral and ring binder and damages the pages
Paper corners which are to be used only with paper memorabilia need only pass the standard for permanent paper ANSI/NISO Z39.48, Permanence of Paper for Publication of Documents in Libraries and Archives. This standard specifies the characteristics of paper that is of a permanent nature and which will not harm other documents with which it is in contact.
Don’t rush to remove photographs from albums just because you think the album is not “archival”. Many older albums with black, gray or colored paper actually may not be harming your photographs while removal may cause immediate damage that is not easily repaired! In addition, older family heirloom albums frequently have valuable inscriptions and a character all their own that would be lost by replacement with a modern album. People sometimes erroneously assume that damage they see is caused by the paper when in fact the damage occurred years ago. For example, stains and fading (especially on black-and-white photos) can be the result of poor processing by the photographer or the glues originally used to spot adhere the photos to the pages. Very little can be done to reverse the damage in these situations. However, some album page papers, even different types of photos or poorly processed photos, or previous tape mends which are in contact with photos on adjacent pages, may be contributing to fading or staining. One simple solution is to interleave those pages with these problems using high quality paper or plastic sheets to isolate each page from its neighbor. Care should be taken so that the album doesn’t become overstuffed with the interleaving, possibly breaking the binding. If the photos really are deteriorating and you choose to have the album disassembled to ensure their preservation, photocopies in color or black-and-white can be made of each page to capture the look and feel of the original, preserve all inscriptions, and keep a record of the order in the album.
As mentioned above, removing photos from old self-stick album pages that have dried up, especially when the plastic cover sheet no longer sticks to the page and the page has discolored, may be easy–frequently the photo just falls off! However, removing photos from pages that are in the extremely tacky stage can cause permanent damage. This treatment, especially for those photos that are very important to you, is best left to trained conservators. Photographs which were recently attached to self-stick album pages usually can be removed easily within a year or two by inserting a thin knife under the edge of the photo and gently separating the photo from the page. Never curl or peel back a photo from a self-stick page as the photo may be permanently cracked and curled in the process.
Decorative frames, available at many stores, are appropriate for everyday snapshots. However, these frames either do not come with a mat or spacers to keep the photo from contact with the glass, or they use a poor quality acidic paper mat. Unfortunately, many unmatted photos have been damaged or permanently stuck to glass when fluid seeped between the glass and photo after the glass had been sprayed with liquid cleaner or beverages were spilled near the frame. Never use spray cleaners around photographs and artwork. Many cleaners are corrosive and cause immediate fading and staining if they, or their vapors, come in contact with the photograph.
Important family photos or photographic artworks should be matted to museum standards using high quality matboard for the window mat and the back board. The matboard should pass the ANSI IT9.16 Photographic Activity Test (PAT). (The PAT was developed by the American National Standards Institute (ANSI) and is a test that determines whether or not a storage material will cause fading or staining in photographs.) The safest way to attach the photograph to the back board is with paper or plastic photo corners or paper or plastic edge strips. Edge strips are folded pieces of paper or plastic which secure the edge of the photograph to the back board–the edge of the photo is inserted into the fold and then the edge strip is adhered to the back board. Photo corners and edge strips are ideal in situations where the window mat will cover over the edges of the photo and hide the photo corner or edge strip. Photo corners should not be used on unmounted prints larger than 20 x 24 inches, or very fragile photos. These items should be attached to the back board with paper hinges adhered to the back top edge of the photo (then secured to the back board) or with edge strips along all four edges. Hinging should be left to a qualified framer or someone with training and the proper tools, hinging papers and adhesives.
Once a treasured photograph is properly matted and framed, it should not be displayed in direct sunlight, or under bright lamps, near heat sources or in damp locations such as basements, kitchens or bathrooms. Based on studies by Kodak, typical ambient (diffuse) home lighting is probably not harmful over the course of several years, but light slowly will cause fading and other irreversible damage that may not become objectionable for many years. Therefore, treasured photos which you intend to pass on to future generations should not be displayed excessively in your lifetime. Instead, a duplicate copy can be made and displayed while the original is kept safe with other family keepsakes.
The preservation of photographs, and all documents and artworks, depends on the storage environment and the storage enclosures. Many institutions have climate controlled storage rooms with purified air, kept at constant moderate or cool temperatures (e.g., 65-70F) and moderate relative humidities (e.g., 35-50%). Some institutions even have cold vaults for certain types of photographs that are very prone to deterioration, such as color photographs and older films. Unfortunately, these conditions are not easily found or maintained in homes! However, there are things you can do to improve the storage climate for your valuable photographs in your home: store your photographs in the coolest and driest spot in your home that stays that way year round. Finished basements frequently are cool, but they are usually too damp for photo storage unless they are dehumidified. Dampness should be avoided as it causes photos to stick together, and promotes mold growth. Above ground interior closets maintain fairly constant temperatures throughout the year, and should be considered for storage.
All plastic and paper materials used to house and store valuable and heirloom photographs should pass the ANSI IT9.16 Photographic Activity Test (PAT). (The PAT was developed by the American National Standards Institute (ANSI) and is a test that determines whether or not a storage material will cause fading or staining in photographs.) In addition, other storage materials such as envelopes, folders, sleeves, and boxes should meet the standards described in ANSI IT9.2 Photographic Processed Films, Plates, and Papers–Filing Enclosures and Storage Containers. Many manufacturers make storage materials which meet these two standards and advertise them in their catalogs.
Look for paper enclosures that are made from a high quality, non-acidic, lignin-free paper (buffered or unbuffered are OK) made from cotton or highly purified wood pulps. Paper envelopes with center seams should be avoided–if the seam adhesive causes fading or staining it will happen in the middle of your photograph. If you do use an envelope with a center seam, place the back side of the photo against the seam–any deterioration would have to work its way through the back before attacking the image on the front.
Look for plastic enclosures made from uncoated pure polyethylene, polypropylene or polyester (also called Mylar D or Mellinex 516). These are considered stable and non-damaging to photographs. Polyester is crystal clear and is more rigid than polyethylene and polypropylene. None of these recommended plastics have any odor to them, while polyvinyl chloride (PVC) plastic does have a strong odor (the new car smell). Avoid the use of PVC plastics–they generate acids which can fade the photograph in time. In addition, the plastic can stick to items inside and, in some types of photographs (and printed items such as baseball cards), actually cause the image to transfer to the plastic. For these reasons, PVC enclosures should not be used for valuable photographs or those you want to preserve for a long time.
Albums are an ideal storage method for photographic prints, especially snapshots and heirloom photographs–the photographs can be safely stored and organized, and safely viewed, without inflicting damage from frequent handling. Albums should be used to store selected groups of photographs, as they are expensive and somewhat bulky storage options. Not all photographs are really worth keeping; snapshot collections should be weeded of poor prints (blurred images, bad exposures) or less desirable photos (multiples, poorly cropped images) before housing the best ones in an album or other storage method (described below).
Besides albums, there are many different types of storage enclosures designed for the different photographic formats and sizes. These include folders, sleeves, and envelopes. The choice of enclosure depends not only on resources but also the frequency that the photos will be handled for viewing and their current fragility. In general, if a photograph is handled frequently or is fragile, it should be stored in its own enclosure such as a folder, envelope or plastic sleeve, then grouped in a box. Photos which are handled very frequently should be stored in their own plastic folders or sleeves so that they can be viewed without removing from the enclosure. Plastic enclosures also protect the photo surface from fingerprinting while it is being viewed. Remember, it is best to always hold a photograph by its edges, supporting it from underneath with your hand. Individual enclosures also protect from wear and tear and provide physical support to fragile or damaged photos. Very fragile photos such as those with large tears and breaks, brittle photos, photos with broken mounts or those with a damaged surface can be put in one of the enclosures listed above with a rigid piece of paperboard behind the photo for extra support. A less expensive option for storage is to group photos in folders. This approach is fine for photos that are in good condition and are rarely handled. Remember that damaged photos can be copied or photocopied, and the copy used instead to protect valuable originals.
Photographs can also be stored in plastic pocket pages and standard size plastic sleeves, grouped in folders for organization, then stacked in a box. Photographs 8 x10 inches or smaller can be stored vertically on their long edges in standard size boxes which are available for many photographic formats, including modern and nineteenth-century photographs. Photos larger than 8 x 10 inches, or those with damaged edges (brittle, torn) should be stored flat in small stacks inside standard size boxes. Groups of similar sized photos which are all the same type, such as modern 4 x 6 inch color snapshots, or older 2-1/4 inch black-and white snapshots, can be stored vertically or horizontally together without extra housings–photos which are the same type are usually safe to store in contact with each other. Boxes should be neither over stuffed or under filled. Over stuffing causes damage when photos are pulled out or filed away; under filling causes the photos to slump and curl.
Lastly, the safest, and most expensive, way to store photographs is to mat them in high quality ragboard or matboard. This method is excellent for photos that are to be framed and displayed. (from – www.archives.gov)
We have been featured on CNN, Fox, ABC, New York Times etc…